Actions after submit
Save submissions, send emails, redirect, auto-reply, and send data to webhooks, Slack or Discord.
On this page
When a visitor sends a form, Urmi checks every answer on the server and then runs the form's actions: it saves the submission, emails you, can send the visitor a confirmation, open a thank-you page, and pass the answers on to a webhook, Slack, Discord or a newsletter service. You set all of this per form, in the Form widget's Content tab.
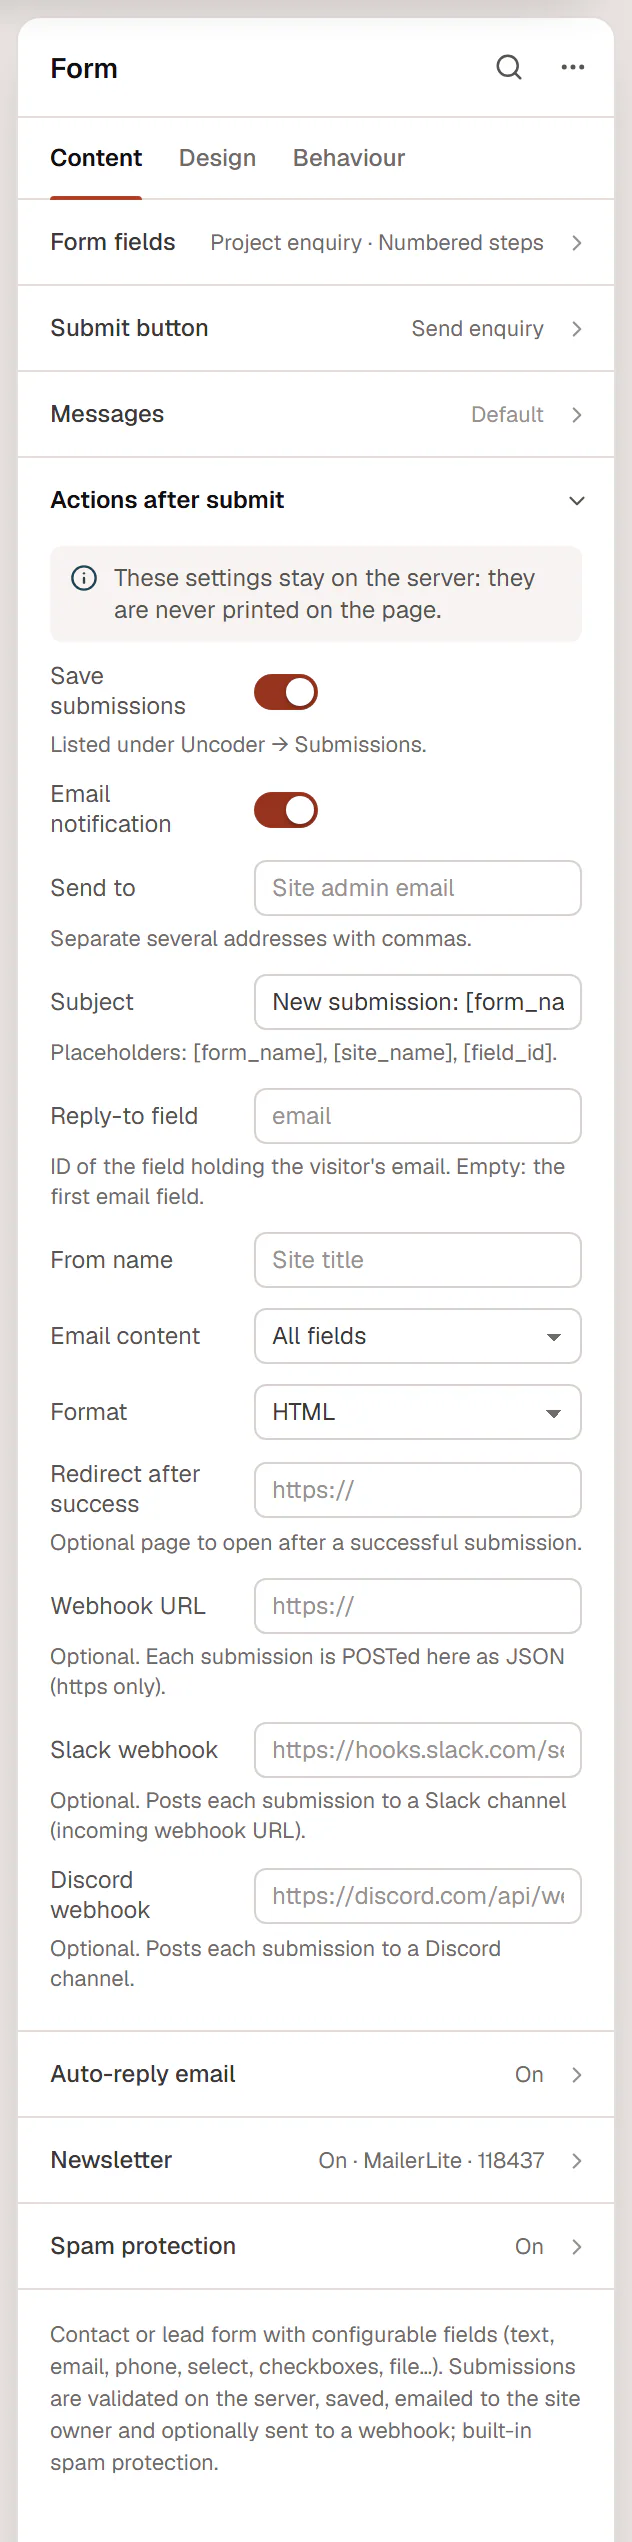
These settings stay on the server: email addresses and webhook addresses are never printed in the page's code.
Save submissions
Save submissions (on by default) keeps every submission in Urmi → Submissions. See Submissions. Turn it off only if the email or another action is enough for you. If a submission is neither saved nor delivered anywhere (for example because email sending failed), the visitor sees the Error message instead of a false success, so nothing gets lost silently.
Email notification
Email notification (on by default) sends you an email for every submission.
| Setting | What it does |
|---|---|
| Send to | One or more addresses separated by commas (up to 10). Empty: the site's administration email address. |
| Subject | "New submission: [form_name]" by default. Placeholders: [form_name], [site_name] and [field_id] (the answer of a field, for example [name]). |
| Reply-to field | The Field ID of the field with the visitor's email address, so that replying to the email writes to the visitor. Empty: the first Email field. |
| From name | The sender name. Empty: your site title. |
| Email content | All fields lists every answer with its label. Custom template lets you write the email yourself. |
| Template | With Custom template: your text, with the placeholders [field_id], [all-fields], [form_name], [page_url] and [site_name]. |
| Format | HTML (formatted) or Plain text. |
Every notification ends with a line saying which form and which page it was sent from. Files uploaded with the form are linked in the email; the links only work for people logged in to your site with permission to see submissions.
Emails are sent by WordPress. If notifications land in spam or do not arrive, set up an SMTP or email delivery plugin for your site.
Redirect after success
Redirect after success takes the visitor to another page after a successful submission, for example a thank-you page with next steps or a booking calendar. Type the page address. The success message shows for a moment, then the page changes. Leave it empty to stay on the page.
Webhook URL
Webhook URL sends every submission as JSON to another service, for example Zapier, Make, n8n or your own system. The address must start with https:// and be reachable on the internet. Urmi waits up to 3 seconds for an answer, so a slow service never holds up your visitor.
The data looks like this:
{
  "event": "form_submission",
  "form": { "name": "Contact form", "document": 32, "element_id": "t0il5if" },
  "submission_id": 128,
  "page_url": "https://example.com/contact/",
  "submitted_at": "2026-09-28T09:14:02+00:00",
  "fields": { "name": "Grace Holloway", "email": "grace.h@example.com", "message": "Could you share rough fees?" },
  "data": [
    { "id": "name", "label": "Name", "type": "text", "value": "Grace Holloway" }
  ],
  "site": "https://example.com/"
}
fields holds each answer by its Field ID; data holds the same answers with their labels and types. Uploaded files are sent as their file name only.
Slack and Discord
To post each submission in a chat channel, paste an incoming webhook address:
- Slack webhook: create an incoming webhook for your channel in Slack and paste its address (
https://hooks.slack.com/services/…). - Discord webhook: in the channel's settings, open Integrations → Webhooks, create one and paste its address (
https://discord.com/api/webhooks/…).
The message reads "New “Contact form” submission on Northwind Studio", followed by the label and answer of each filled-in field and the address of the page it was sent from.
Auto-reply email
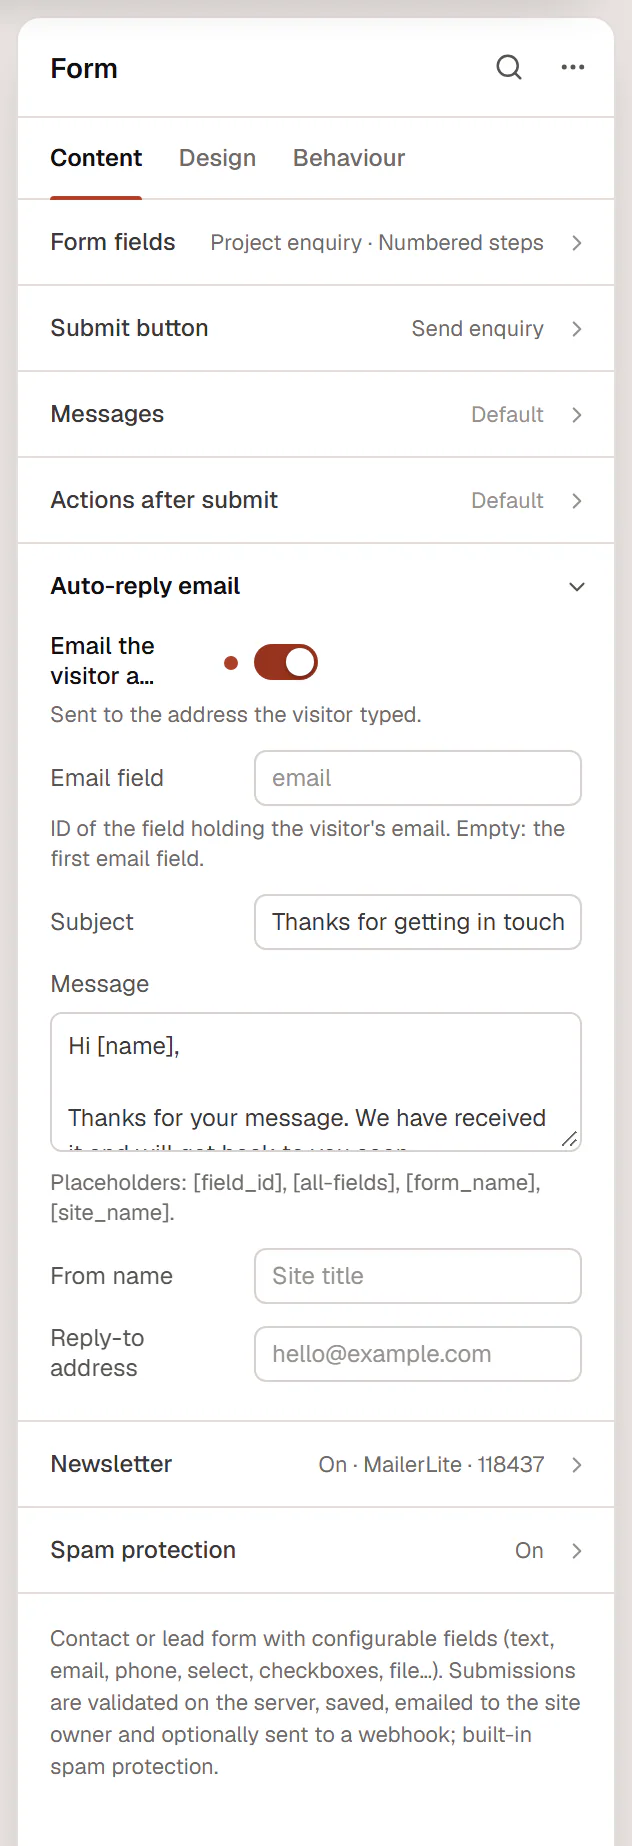
The Auto-reply email section sends the visitor a confirmation, for example "Thanks, we got your message".
| Setting | What it does |
|---|---|
| Email the visitor a confirmation | Turns the auto-reply on. It goes to the address the visitor typed. |
| Email field | The Field ID of the visitor's email field. Empty: the first Email field. |
| Subject | "Thanks for getting in touch with [site_name]" by default. |
| Message | The text of the email. Placeholders: [field_id] (for example [name]), [all-fields], [form_name] and [site_name]. |
| From name | The sender name. Empty: your site title. |
| Reply-to address | Where replies to the auto-reply go, for example hello@yourstudio.com. |
Who can set up actions
Actions send emails and data in your site's name, so Urmi only trusts them when the form was last saved by someone who may edit other people's content (Editors and Administrators). If an Author or Contributor saves the page, the form still works, but notifications go to the site's administration email only, and the webhooks, Slack, Discord, auto-reply and newsletter actions are skipped until an Editor or Administrator saves it again.