Menu Anchor
An invisible target that one-page menu links scroll to.
The Menu Anchor is an invisible marker on the page. A link to # plus its name, for example #pricing, scrolls the page to it. Use it for one-page menus, “Back to top” links or a button that jumps to a form further down. Visitors never see the anchor; in the editor it shows as a small #pricing label.
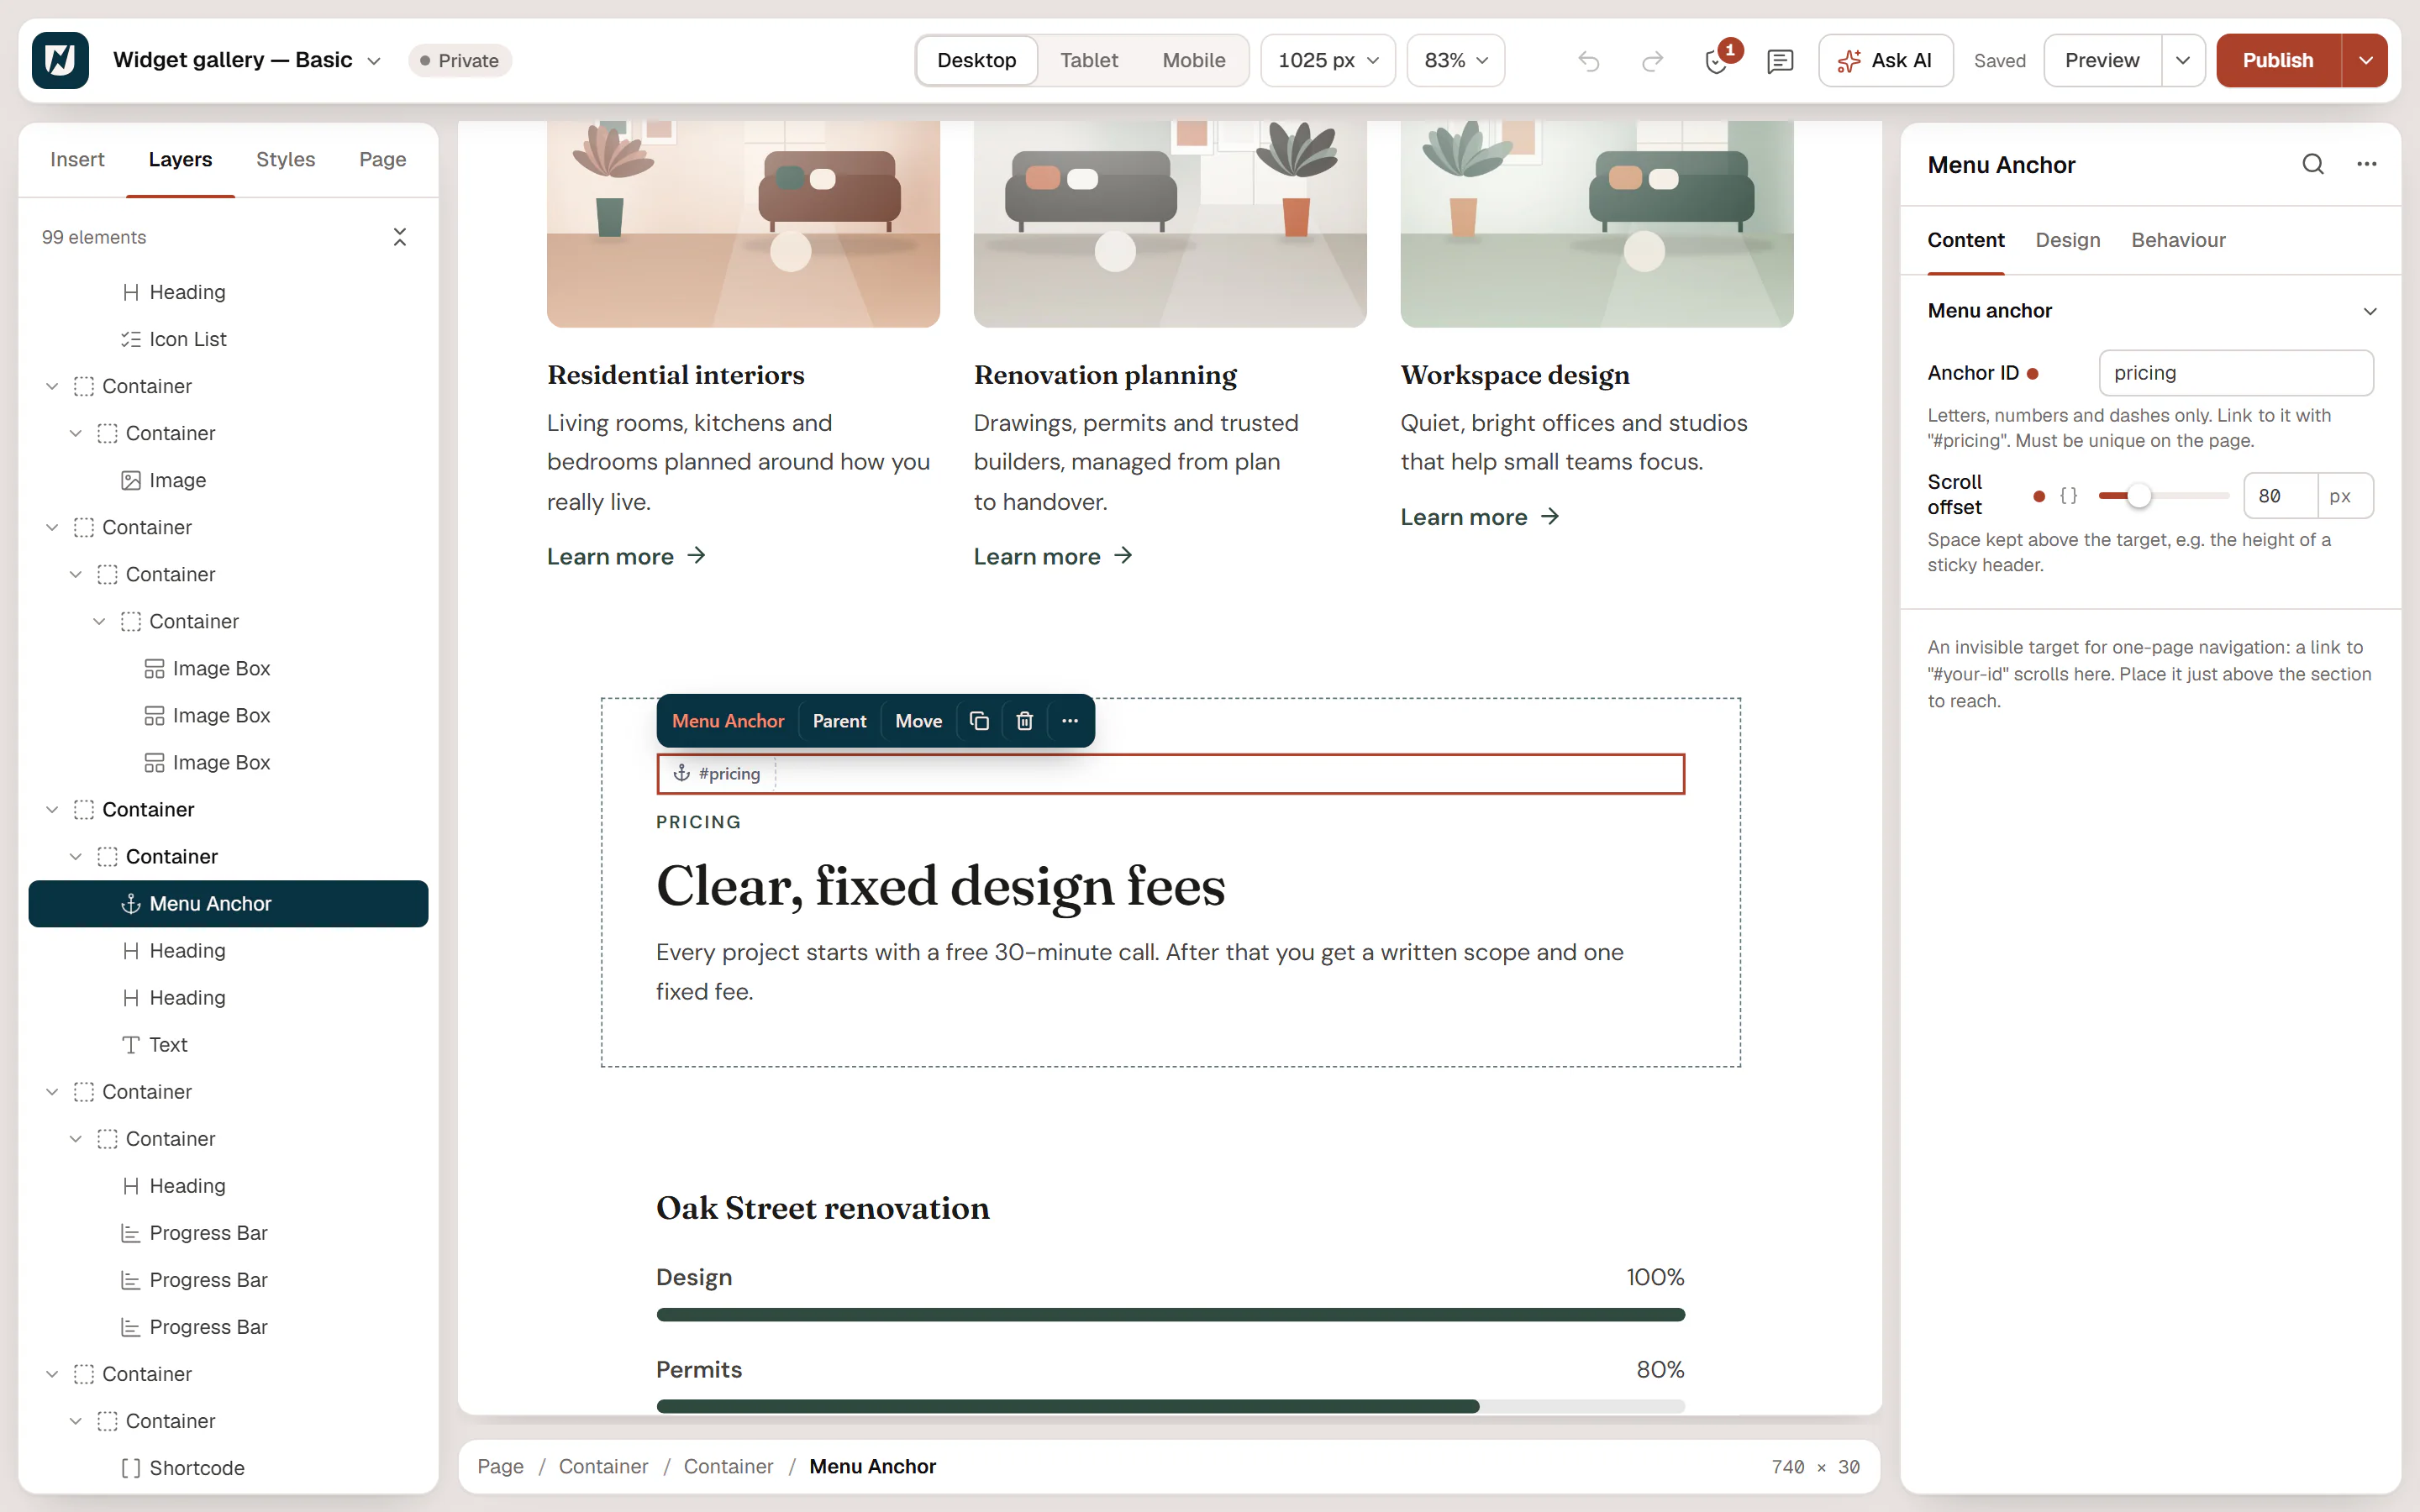
Add a menu anchor
Insert it above the target
Open Insert in the left panel, find Menu Anchor under Basic (or type
anchorin Search widgets) and drop it just above the heading or section you want to reach.Name it
Type an Anchor ID such as
pricing: letters, numbers and dashes only, unique on the page.Link to it
In a button, a menu item or text, set the link to
#pricing(or/page/#pricingfrom another page).Leave room for a sticky header
If your header stays on screen, set Scroll offset to about its height so the target is not hidden under it.
Settings
Content tab
| Setting | What it does |
|---|---|
| Anchor ID | The name links use to jump here: with pricing, a link to #pricing scrolls to this spot. Letters, numbers and dashes only, and unique on the page. |
| Scroll offset | Space kept above the anchor when the page scrolls to it, for example the height of a sticky header. |
Design tab
Every element also has these sections at the end of the Design tab.
| Section | What it does |
|---|---|
| Spacing & position | Margin, padding, width, alignment in its container, order, position (relative, absolute, fixed), offsets, z-index and global classes. See Spacing, size & position. |
| Background & border | Background, border, border radius, box shadow, overflow and opacity of the whole element. See Colors & backgrounds and Borders & shadows. |
| Mask | Crops the element to a shape (circle, arch, blob, star…) or your own SVG or PNG. See Shape dividers & masks. |
Behaviour tab
The Behaviour tab is the same for every element.
| Section | What it does |
|---|---|
| Anchor & classes | An Anchor ID for #links and your own CSS classes. |
| Animations | Entrance, scroll, hover and loop animations from presets or your own timeline. See Motion & effects. |
| Motion & effects | A simple entrance animation, transforms (also on hover), CSS and backdrop filters, and sticky positioning. |
| Scroll & mouse effects | Movement, rotation, scale, fade and blur while the page scrolls, and pointer effects (follow the pointer, 3D tilt). |
| Visibility | Hide the element on desktop, tablet or mobile, or in dark or light mode. See Visibility. |
| Conditions | Show the element only when rules match, such as logged-in visitors, a date range or a URL parameter. See Display conditions. |
| Interactions | Show, hide or change other elements when this one is clicked, hovered or scrolled into view. See Interactions. |
| Attributes | Custom HTML attributes for this element. See Anchor, classes & attributes. |
Tips
- Any element can be a target. Every element also has an Anchor ID in Behaviour → Anchor & classes. The Menu Anchor is handy when you want the jump to stop above an element, or need an offset.
- Smooth scrolling. Turn on Smooth scrolling in Styles → Theme → Site behaviour for a gentle scroll instead of a jump. See Lightbox & site behaviour.
- Menu links. In Appearance → Menus, add a Custom link with the URL
#pricing(or the full page URL plus#pricing) for a one-page menu.