Newsletter services
Add subscribers to Mailchimp, MailerLite, Brevo or ActiveCampaign.
Any Urmi form can add the people who send it to your mailing list: a dedicated newsletter signup, or a contact form with a "Send me the newsletter" checkbox. Urmi works with Mailchimp, MailerLite, Brevo and ActiveCampaign. You connect the service once in the settings, then turn on Newsletter in each form that should add subscribers.
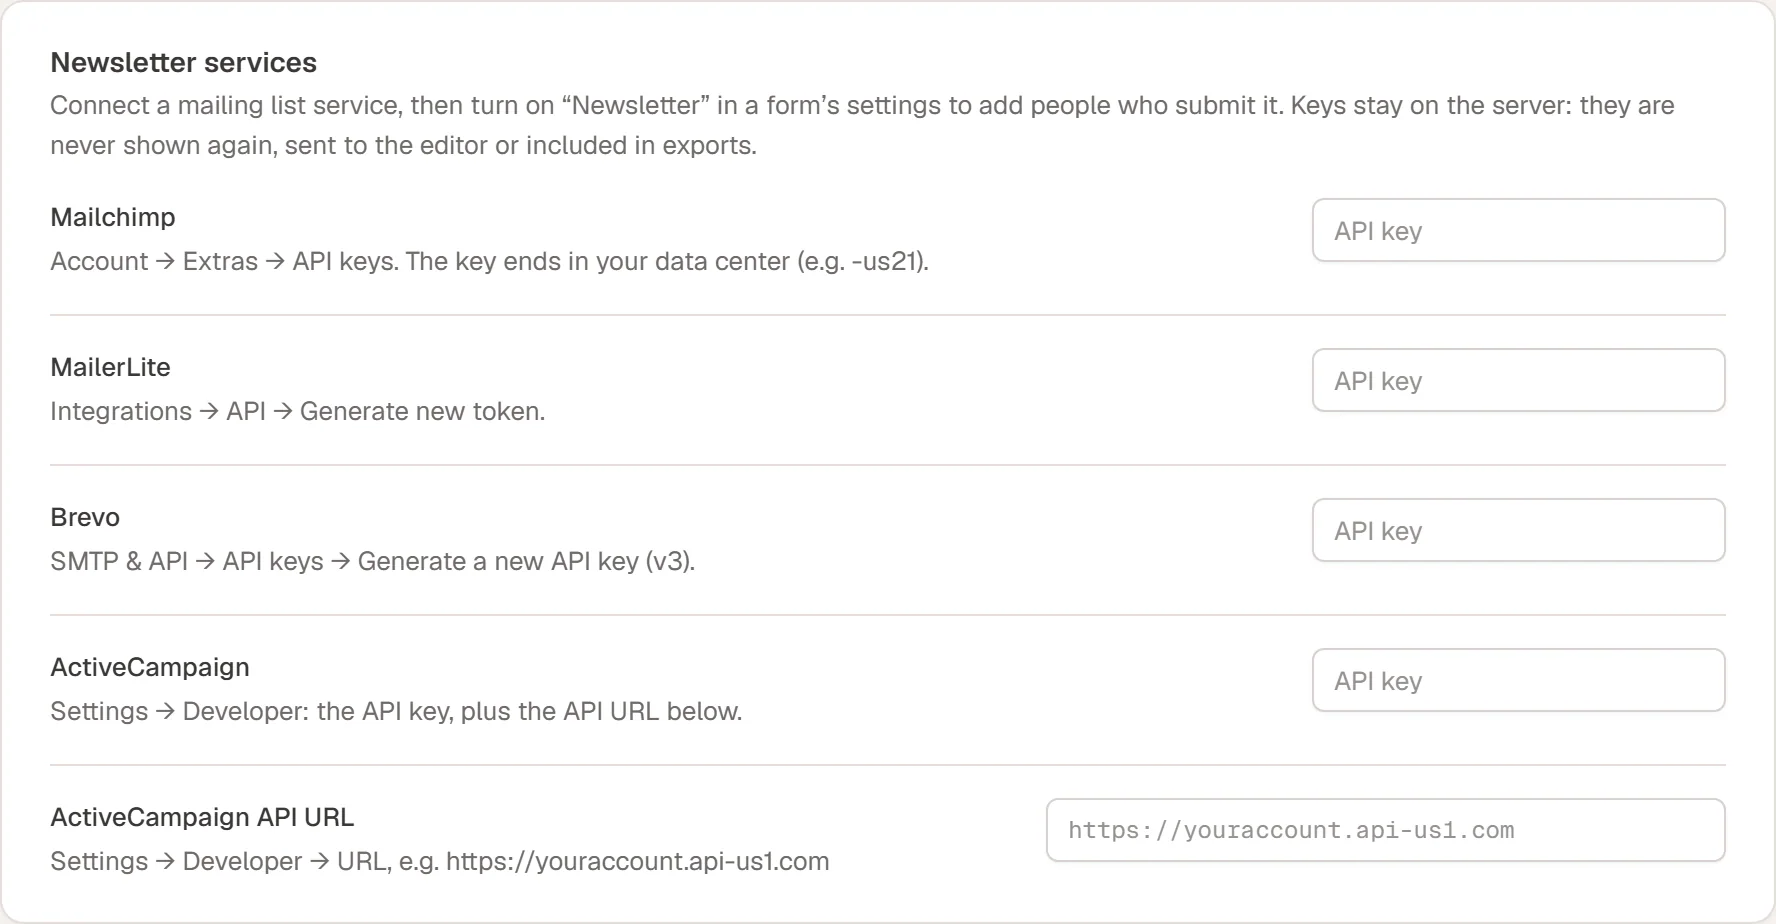
Connect your service
Get an API key
Create a key in your service's account:
Service Where to find the key Mailchimp Account → Extras → API keys. The key ends with your data center, for example -us21.MailerLite Integrations → API → Generate new token. Brevo SMTP & API → API keys → Generate a new API key (v3). ActiveCampaign Settings → Developer: the API key, and the API URL (for example https://youraccount.api-us1.com).Paste it in Urmi
Go to Urmi → Settings → Forms. In Newsletter services, paste the key into the service's field (and, for ActiveCampaign, the ActiveCampaign API URL). Click Save changes in the bar that appears at the bottom.
Keys stay on the server. After saving, the field only shows that a key is saved; it is never shown again, sent to the editor or included in site exports. To replace a key, paste a new one. To remove it, click Disconnect (then Keep if you change your mind before saving).
Add subscribers from a form
Open the form's Newsletter settings
Select the Form widget and open Content → Newsletter. Turn on Add to a mailing list.
Choose the service and list
Pick the Service and type the List / group / audience ID: the audience ID for Mailchimp, the group ID for MailerLite, the list number for Brevo and ActiveCampaign.
Map the fields
Email field is the Field ID of the email field (empty: the first Email field). Name field is optional, for example
name.Ask for consent
To add only people who agree, add an Acceptance (consent) field to the form (for example "Send me the monthly studio newsletter.") and type its Field ID in Consent checkbox field.
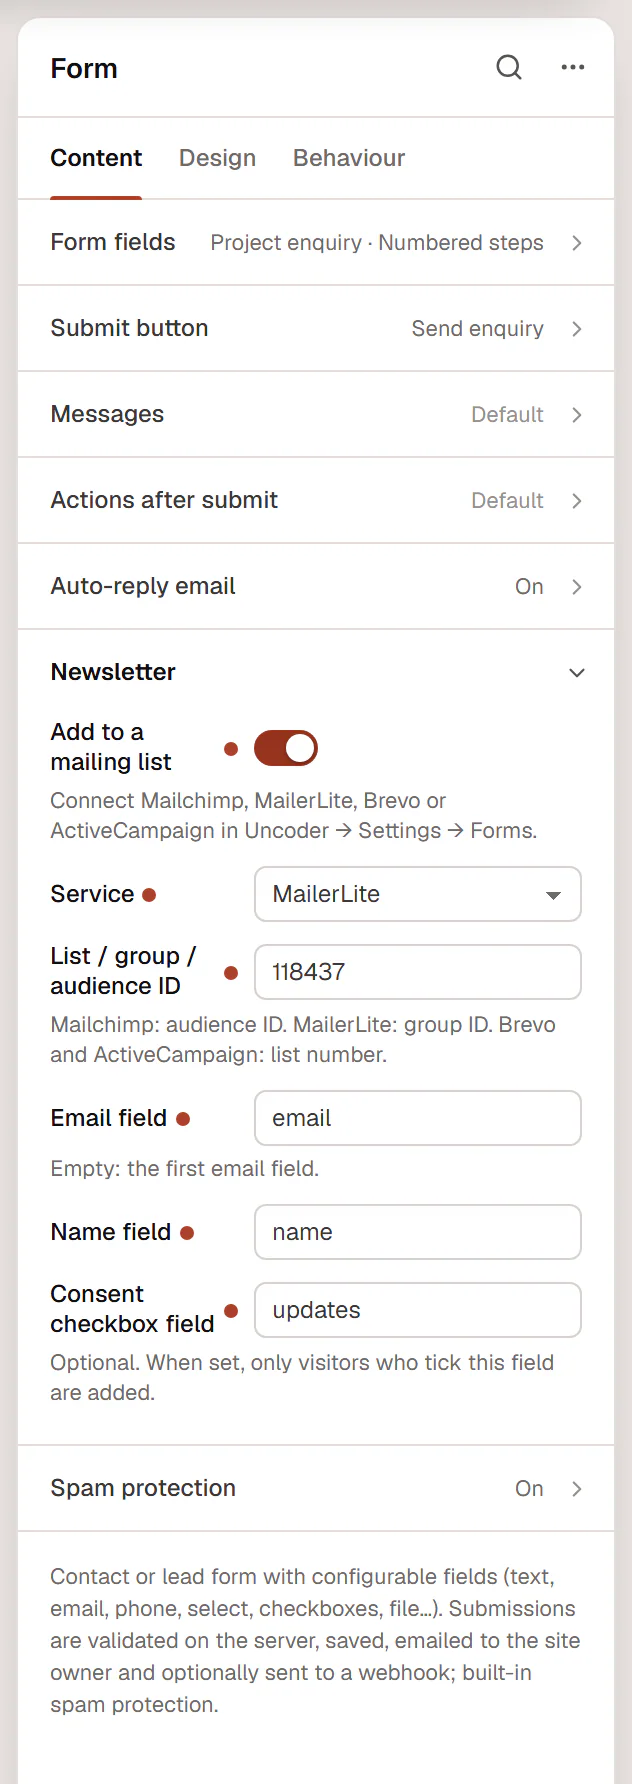
| Setting | What it does |
|---|---|
| Add to a mailing list | Turns the newsletter action on for this form. |
| Service | Mailchimp, MailerLite, Brevo or ActiveCampaign. The service must be connected in Settings → Forms. |
| List / group / audience ID | Where subscribers go. Mailchimp: audience ID. MailerLite: group ID. Brevo and ActiveCampaign: list number. |
| Email field | Field ID of the email address. Empty: the first Email field. |
| Name field | Field ID of the name, sent as the subscriber's first name. |
| Consent checkbox field | Optional. When set, only visitors who tick this field are added. |
| Double opt-in (Mailchimp) | New Mailchimp subscribers first confirm by email. |
What each service receives
- Mailchimp: the email address, and the name in the first-name field. New people are added as subscribed, or as pending with Double opt-in; people already on the audience keep their status.
- MailerLite: the email address and name, added to the group.
- Brevo: the email address and first name, added to the list. Existing contacts are updated.
- ActiveCampaign: the contact (email and first name) is created or updated, then added to the list.
The form's other answers are not sent to the service. If the service is not connected, the list ID is empty or the email address is not valid, the submission is still saved and emailed as usual; only the subscription is skipped.